Find fully automated Photoshop Action that sets up Frequency Separation (FS) in just one click—saving you time and effort.
🎁 Download the FREE Frequency Separation Action
🔗 (Replace with your actual download link)
How to Install & Use It
1. Install the Action
-
Open Photoshop.
-
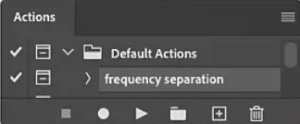
Go to Window → Actions (Alt+F9).
-
Click the ≡ Menu → Load Actions and select the
.atnfile.
2. Run the Action
-
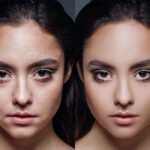
Open your portrait image.
-
Select the “Frequency Separation“ action.
-
Click the Play button (▶️).
-
Photoshop will auto-generate the High & Low Frequency layers!
3. Start Retouching
-
Edit color/tone on the Low Frequency layer.
-
Refine texture/details on the High Frequency layer.
Why Use This Action?
✅ Saves time – No manual setup!
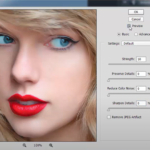
✅ Customizable blur strength – Edit the Gaussian Blur layer to adjust smoothing.
✅ Works in Photoshop CC+ – Compatible with most versions.
Pro Tips for Best Results
-
Adjust the blur radius (double-click the Gaussian Blur layer).
-
Use a low-opacity brush (20-30%) for subtle retouching.
-
Combine with Dodge & Burn for professional lighting control.
Want More FREE Photoshop Goodies?
Let me know if you’d like:
-
Portrait retouching brushes
-
Dodge & Burn actions
-
AI-powered skin-smoothing presets
If you are looking for the best photo retouching company which offers all types of photo retouching and editing works you can contact at PicsRetouch.